My moon for this piece of work needed to be big, luckily this dish at 14" diameter fitted the bill nicely. Using freezer paper and a scalpel I cut round the circumference.
This is the piece I require.
Using a hot iron and no steam I pressed the freezer paper onto the linen background shiny side down.
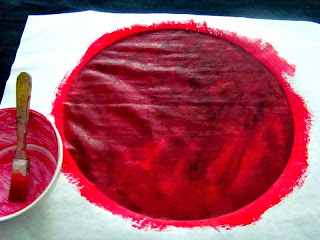
Because this is a harvest moon I want the colour to be warm behind the gilding so using a little fabric medium and magenta primary acrylic I paint a layer onto my fabric.
This is where a little patience is needed, it takes at least an hour sometimes more to dry thoroughly. It needs to be bone dry before the next stage.
Acrylic gold size has always been my choice for working on fabric, it will stay tacky for ages which is a big help with gilding. A thin coat is brushed on and left to 'cure' for at least 15mins. It should be sticky but not wet.
I leave the leaf (copper in this case) on its tissue backing and lay it face down on the sized ground. I go over it gently with a soft brush to make sure it has adhered, then carefully remove the carrier tissue . This piece took several sheets which I over lapped slightly. Fill in any 'holes' with tiny pieces of leaf until the surface is covered.
Using a soft brush gently remove all the surplus leaf.
This is the most satisfying part of gilding seeing the perfection of your shape appear.
Carefully lift the freezer paper off in one corner and gently remove.
Doing this revealed a tiny paint bleed, no problems a black felt tip took care of this.
My harvest moon which I will allow to settle before I work into it with some metallic rubs to make it more moon like.


Stunning!!
ReplyDeleteThis is fascinating - and a glorious result.
ReplyDeleteI've never tried any gilding so it's especially interesting to see the process. Thank you so much for sharing it with us.
Thanks for sharing the process. The moon just glows
ReplyDelete